- Call us 01444 237070

-
- Back
- Used Cameras
- Used Accessories
- Used Lenses
- Back
- Used Canon Lenses
- Used Nikon Lenses
- Used Fujifilm Lenses
- Used Sony Lenses
- Used Micro 4/3rds Lenses
- Used Leica Lenses
- Used Panasonic Lenses
- Used Pentax Lenses
- Used Samyang Lenses
- Used Sigma Lenses
- Used Tamron Lenses
- Used Tokina Lenses
- Used Voigtlander Lenses
- Used Zeiss Lenses
- Used Hasselblad Lenses
- Used Video
- Used Film Equipment
- Used Stock Alert
- Used Blank Test
- Sell or Part Exchange
- Used Clearance
- Recently Added Used Equipment
- Park Picks
- Faulty
- Trade-In
- Blog
- New in
- Call us
- Contact us
- Stores
- Sign in
- Categories
- Tips & Inspiration
- Reviews
- News
- Events
- Features
- Buying Guides
- Competitions
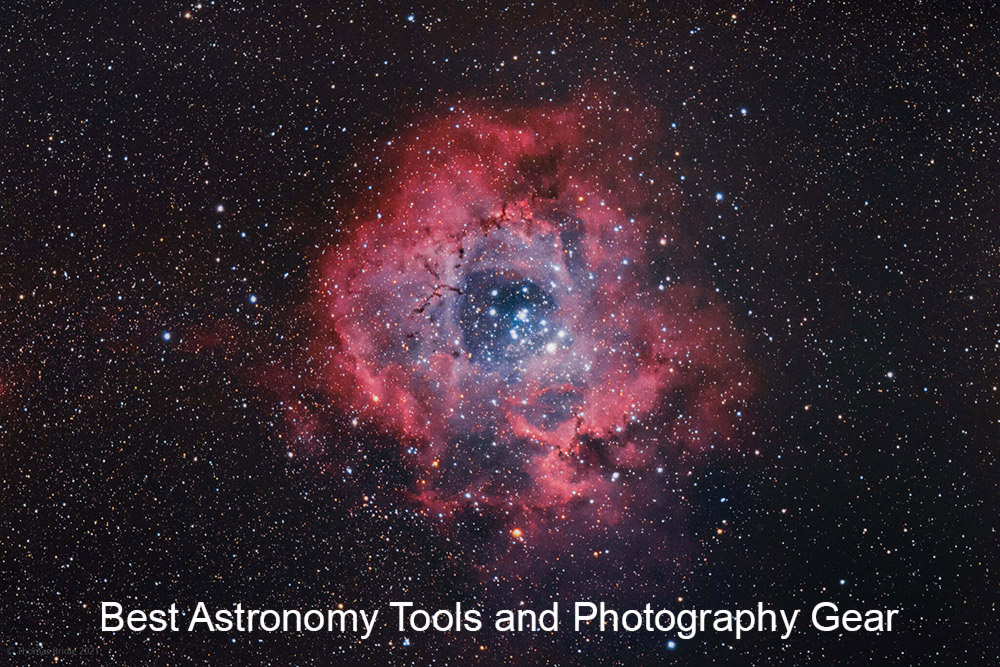
Best Astronomy Tools and Photography Gear
Exploring the night sky is one of the most rewarding ways to combine observation and photography, whether viewing the Moon through binoculars or capturing deep-sky objects with a telescope. From simple tools to smart telescopes and dedicated astrophotography gear, there are now more ways than ever to enjoy astronomy from home or out in the field.
- The best time to photograph the night sky
- How to choose the best telescope for astronomy
- What are the best binoculars for astronomy?
- Best camera for astrophotography
- Best lenses for astrophotography
- Tripods for astrophotography
- Astronomy photography tips and guides
This guide to the best astronomy tools and photography gear brings together useful advice and up-to-date equipment choices to help you get started, or to refine your astro setup. It covers when to photograph the night sky, how to choose the right telescope for astronomy, and what to look for in binoculars, cameras, lenses and even tripods for night photography.
Alongside product guidance, discover tips for getting sharper astro photos, planning shoots around seasonal conditions, and learning more through our range of resources.
Whether you’re new to this engaging hobby, upgrading existing kit, or simply researching ideas for astronomy gifts, this guide is designed to help you make the best-informed choices.
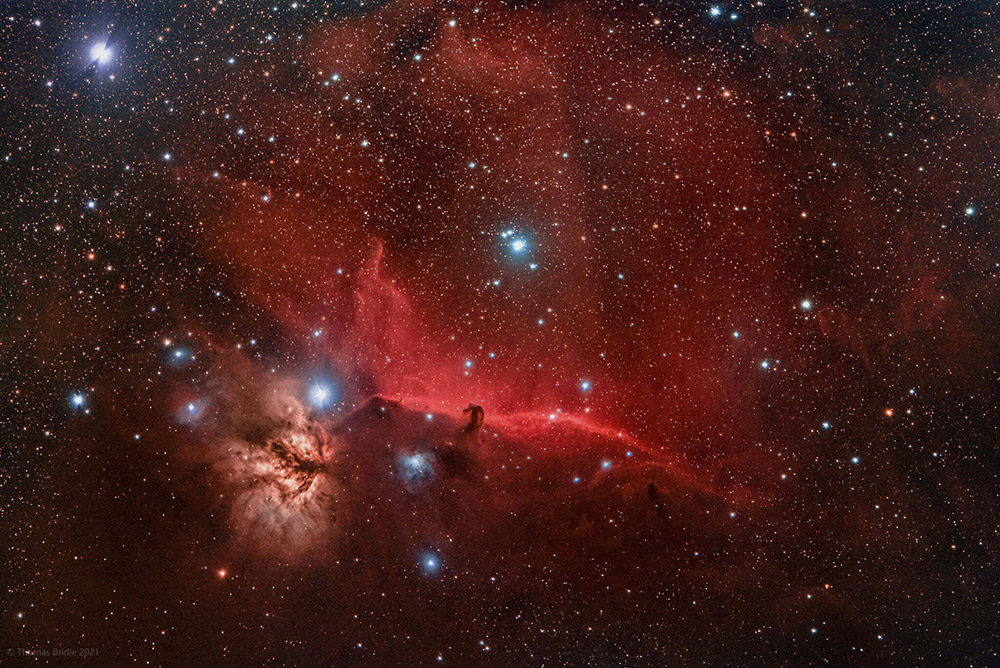
Horse Head and Flame Nebula ©Tom Bridle
When is the best time to photograph the night sky?
While it isn’t always possible to shoot under perfect conditions, planning ahead plays a big part in successful night sky photography. Whether you’re photographing the Milky Way, capturing lunar detail, or simply enjoying visual astronomy with binoculars or a telescope, timing and sky conditions make a significant difference.
For astrophotography and viewing faint objects such as nebulae, galaxies and star clusters, the darkest skies are always best. This means choosing nights with little or no moonlight, avoiding twilight, and heading to locations with minimal light pollution. Even a short distance away from towns and cities can significantly improve contrast and visibility.
Using a dark sky calendar can help plan sessions around moon phases and periods of true darkness. Tools such as the Go Stargazing dark sky calendar are particularly useful for identifying the best windows throughout the year to photograph the night sky at its best.
Astronomy conditions also change with the seasons. In 2026, the year continues to follow a familiar astronomical cycle, with:
- Spring beginning around the March equinox
- Summer marked by the June solstice
- Autumn arriving with the September equinox
- Winter beginning near the December solstice
Each season brings different constellations and subjects into view, making it worth planning your night photography and observing sessions well in advance.
TIP: Prepare for your viewing and night photography by using the Royal Museum’s astronomy planner and plan your trips beforehand. Onto some equipment choices…
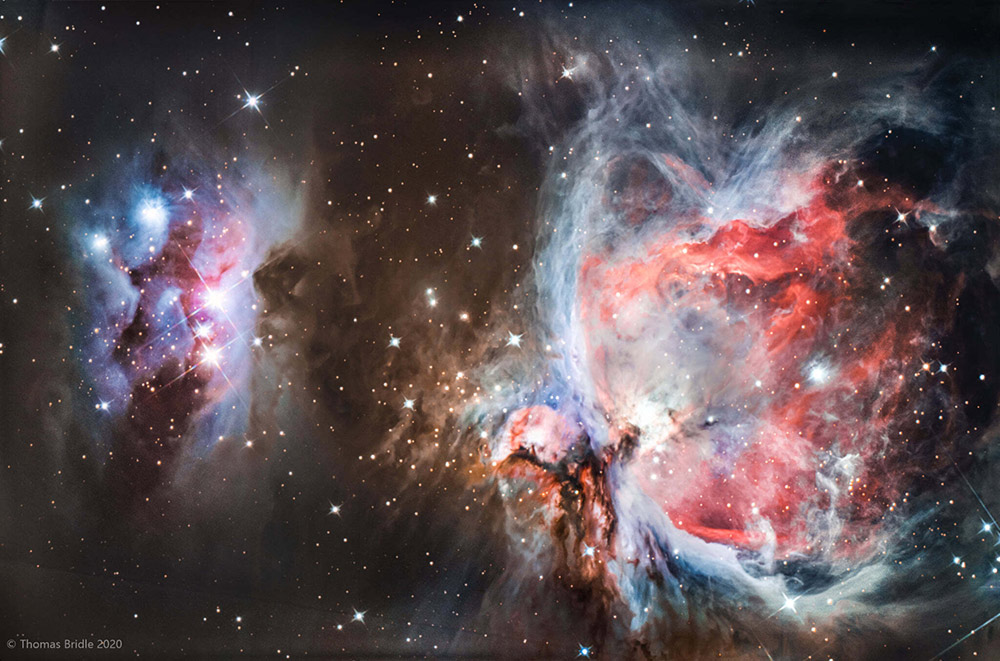
Running Man and Orion Nebula ©Tom Bridle
How to choose the best telescope for astronomy?
Choosing the right astronomy telescope depends on how you want to explore the night sky and how much hands-on involvement you’re comfortable with. For amateur astronomy, modern telescopes now range from fully app-controlled systems to more traditional designs that favour a slower, manual approach.
Understanding these differences makes it much easier to select a telescope that suits your interests and experience level. Before looking at individual models, it helps to consider a few key factors:
- How much setup and alignment you’re comfortable with, from automated systems to manual adjustment
- Whether you want to focus on visual observing, photography, or a mix of both
- Portability and storage, especially if you plan to travel to darker locations
- How much time you want to spend learning the fundamentals of telescope operation
With all that said, let’s look at the variety of smart telescopes for beginners and enthusiasts next.
New telescope brands at Park Cameras
In 2025 Park Cameras added new models from ZWO, a popular brand of Smart telescopes from China. Previously, we were thrilled to announce back in 2023 that Sky-Watcher Brand Joined Park Cameras, adding to our range of options for celestial fans. These include the Sky-Watcher Star Adventurer GTi Mount and Tripod, which costs just £435.00 during our special offer, yet provides easy Go-To camera control via the App to explore 10,000+ Objects in the night sky. When adding the Sky-Watcher Star Adventurer GTi Mount Head you can attach your camera with a wide or telephoto lens and head straight to your preferred object.
Another option is the Sky-Watcher SkyMax 102 AZ-Go2 WiFi Maksutov-Cassegrain Telescope, which is a great beginners telescope, which features its own built-in WiFi module allowing the mount to be used virtually anywhere.
Unistellar is another newer brand with the state-of-the-art Unistellar EQuinox 2 Smart Telescope, which offers 100% app-controlled functionality. It also features vision technology to enjoy vibrant colours throughout the galaxy, such as Jupiter's great red spot, and details of galaxies and nebulae. At just 9kg you can stow it in the Unistellar Telescope Backpack and take the Equinox 2 to dark sky locations for the clearest views.
Smart telescopes for amateur astronomy
Smart telescopes simplify astronomy massively by combining optics, tracking and imaging into a single, app-controlled device. They are particularly well suited to beginners and anyone who wants to explore the night sky without learning time consuming alignment or mount setup.
Here are some examples of modern guided astronomy telescopes:
A compact smart telescope that combines imaging and observation in an app-based system. It suits users who want guided astronomy with minimal setup while still capturing images of planets and brighter deep-sky objects.
A smaller, more portable option for amateurs, casual observing and imaging. It’s well suited to users who value simplicity and easy transport over advanced control, and either makes great astronomy presents for the kids or parents!
ZWO Seestar S50 All-In-One Smart Telescope
This is an integrated smart telescope that automates alignment, tracking and imaging. It appeals to users who want a streamlined way to explore astronomy and astrophotography without managing separate mounts, cameras or accessories.
ZWO Seestar Smart Telescope S30 Pro
ZWO has an even more compact alternative in the Seestar range, offering similar automated operation, but in a smaller form. This is a good fit for users who want smart telescope functionality with smaller size and weight.
Vaonis Hestia Smartphone Based Telescope Solar Pack
A smartphone-based astronomy tool that uses your phone’s camera to capture celestial subjects. It’s aimed at beginners and educational use, offering a simple introduction to astronomy without the complexity of a traditional telescope.
Pelican Nebula captured by Jonathan Penburthy
Traditional and computerised amateur astronomy telescopes
Traditional and computerised telescopes offer a hands-on approach and are often preferred by enthusiasts who enjoy learning the mechanics. These suit users looking for an amateur astronomy telescope that provides greater control over how they explore the night sky.
Sky-Watcher Heritage 76 Mini Dobsonian Telescope
This is a compact manual telescope for straightforward observing. Its simple operation makes it ideal for beginners while still offering an engaging, hands-on experience to get you into this hobby.
Sky-Watcher Explorer-130 (EQ2) Newtonian Telescope
A larger Newtonian telescope mounted on an equatorial mount, suitable for users who want to learn traditional tracking and alignment techniques. This type of setup is often chosen by amateur astronomers who are keen to progress their skills.
Celestron NexStar 4SE Computerised Telescope
This model is a computerised astronomy telescope that combines manual observing with automated object location. It’s a good option for users who want guidance finding celestial objects without committing to a fully smart telescope system.
Celestron NexStar 8SE Computerised Telescope
A larger and more premium computerised telescope, which is aimed at committed enthusiasts. It suits amateur astronomy users who want deeper exploration and are comfortable with a substantial setup.
This covers a variety of telescopes to suit any budget, but how about a more portable solution for stargazing, which we explore next.
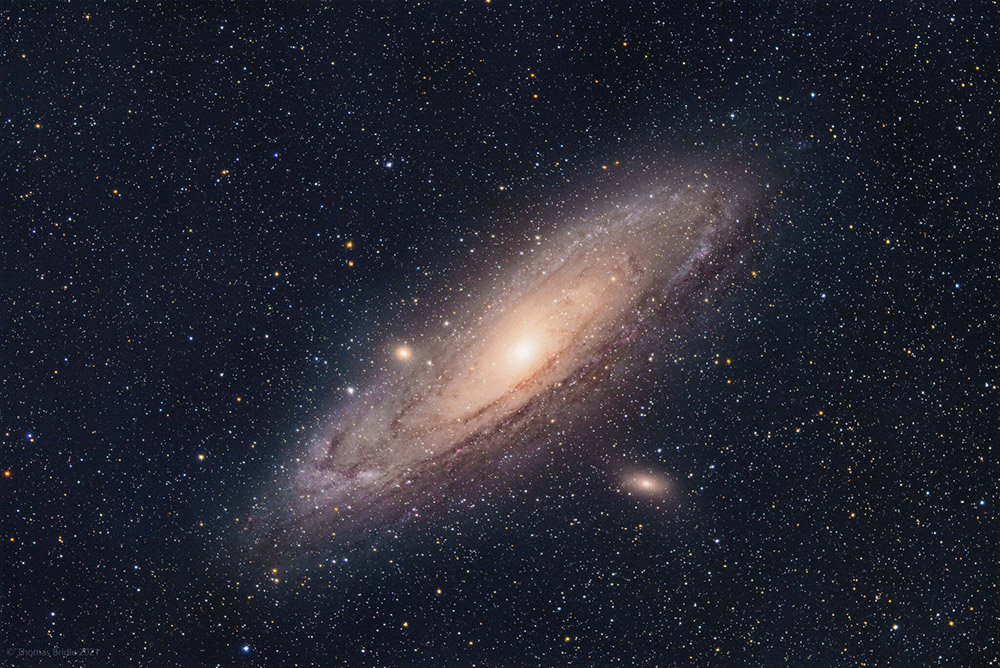
Andromeda galaxy ©Tom Bridle
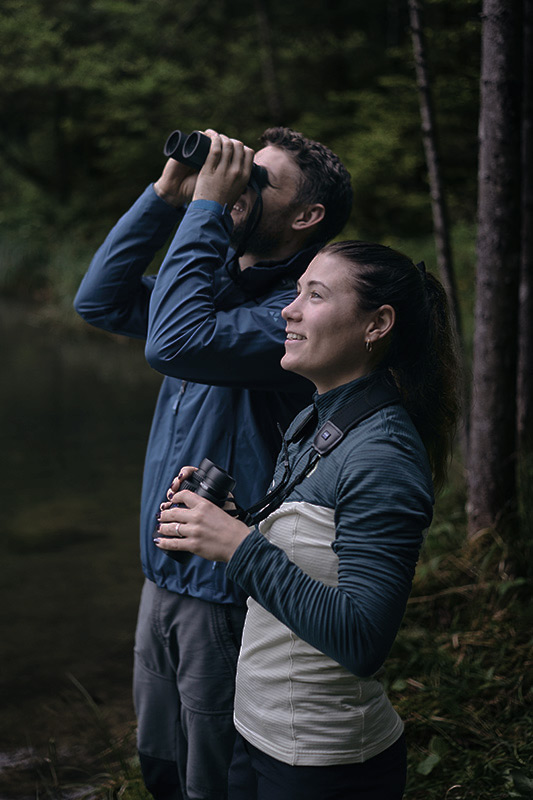
What are the best binoculars for astronomy?
Binoculars offer a simple and portable way to explore the night sky, especially for beginners or anyone who prefers a lightweight alternative to a telescope. The best binoculars for astronomy combine a wide field of view with enough magnification and light-gathering ability to reveal lunar detail, star clusters and brighter deep-sky objects.
When are binoculars better than a telescope for astronomy?
Binoculars are sometimes preferred for casual observing and travel. They are quick to set up, easy to carry, and provide a natural two-eyed view that many people find more comfortable for longer sessions. For scanning the Milky Way, following satellites, or observing the Moon, binoculars can be a lot more practical than a telescope, particularly if travelling to a location.
Next we learn what makes a good binocular for astro.
What to look for in astronomy binoculars
When choosing binoculars for astronomy, look for:
- An aperture between around 32mm and 60mm for effective light gathering
- Magnification in the region of 7x to 12x for a balance between detail and stability
- Image stabilisation or the ability to mount on a tripod for sharper viewing
- Comfortable ergonomics for your sessions
Recommended astronomy binoculars
A bright 10x42 pair with Optical Image Stabiliser and waterproof build. This model gives a comfortable wide field of view and steady viewing, which helps when scanning the night sky or observing lunar detail
High-quality optics with a slightly higher magnification and solid light-gathering for night sky viewing, while still being very portable.
Nikon Monarch HG 10x42 Binoculars
A good choice for astronomy and general night sky observation, offering a wide field of view and great low-light performance.
Nikon Prostaff P3 8x42 Binoculars
A lighter, more accessible option that is great for stargazing and casual astronomical viewing.
Hawke Endurance ED 12x50 Binoculars
A good entry point into astronomy binoculars, with higher magnification suited to Moon and planet viewing.
ZEISS Conquest HDX 10x42 Binoculars
Designed for clarity and comfort, which is most certainly suitable for extended sessions under dark skies.
Leica TRINOVID 10x42 HD Binocular
A premium option offering a strong balance of portability and optical performance for experienced observers.
Premium binos, which are well suited to low-light astronomy viewing, combining high contrast with comfortable handling.
Opticron Adventurer II WP PC 10x50 Binoculars
A budget-friendly choice that still provides the aperture and magnification needed for night sky observation.
As our resident astrophotographer notes, higher magnification binoculars are particularly effective for viewing the Moon, while a tripod or image stabilisation can significantly improve comfort and sharpness. For stars, nebulae and fainter objects, a minimum 42mm aperture is recommended, with larger objectives helping to reveal more detail under darker skies.

How to Choose the best camera for astrophotography
Choosing the best camera for astronomy photography depends on how you plan to capture the night sky. Some photographers use a standard digital camera and lens on a tripod, while others favour a dedicated astronomy camera and a telescope or tracking mount. Both fall under astronomy photography, but create different workflows.
Using a camera for astrophotography without a telescope
DSLR and mirrorless cameras are still the most versatile option for astronomy photography. They work well for wide-field images of the Milky Way, constellations and night landscapes, using standard photographic lenses.
Full-frame cameras are often preferred for their low-light performance and wider field of view, while crop sensor and Micro Four Thirds cameras provide a more compact setup and increased apparent reach for framing distant objects.
Whichever you choose, a fast lens is vital for keeping exposure times shorter, which is key to avoiding star trails and getting sharp results.
Cameras vs smart telescopes for astrophotography
A dedicated astronomy camera offers a different approach, and models such as the ZWO ASI2600MC DUO Colour APS-C CMOS Camera are specifically for deep-sky imaging and are typically used with telescopes and tracking mounts. These are all about sensitivity and long-exposure performance rather than being portable.
Smart telescopes by comparison, combine optics, tracking and imaging. They remove much of the complexity involved in traditional gear and are often better suited to users who want guided astronomy photography without separate cameras, mounts and accessories.
For more advanced users, accessories like the ZWO ASIAIR MINI can be used to control cameras, mounts and imaging sessions wirelessly, helping streamline deep-sky astrophotography in the field.
Aside from a camera you’ll need to choose suitable lenses, which we explore next.
Best lenses for astrophotography
On the whole photographers will use an ultra wide angle lens, with the widest possible aperture to capture astro shots, when showing wide sweeping vistas of the night sky. A wider (or faster) aperture allows the lens to gather more light, which is complemented by high ISO capabilities of the cameras listed previously.
The best camera lenses for astrophotography depend on what you want to photograph in the night sky. Wide-angle lenses are commonly used for Milky Way and night landscape shots, while longer focal lengths are better suited to isolating details such as the Moon or brighter deep-sky objects, especially when used with a tracker.
Wide-angle lenses for Milky Way photography
Wide-angle lenses are the most popular choice for astrophotography without a telescope. They allow you to capture large areas of the sky while keeping exposure times short enough to avoid star trails. A wide maximum aperture helps gather more light, which is especially useful when shooting under dark skies.
These lenses are ideal for:
- Milky Way photography
- Constellations and star fields
- Night landscapes with foreground detail
Telephoto lenses for deep-sky astrophotography
Telephoto lenses are suited to photographing smaller sections of the night sky, such as the Moon or brighter nebulae, particularly when using a tracking mount such as the app controllable Benro Polaris Astro 3-Axis Head. Longer focal lengths magnify distant objects but require greater stability and careful focusing.
When using telephoto lenses for astronomy photography, a sturdy support system and accurate tracking become increasingly important to achieve sharp results during longer exposures.
What to look for in an astrophotography lens
When choosing a lens for astronomy photography, consider:
- A wide maximum aperture to allow more light into the camera
- Good sharpness across the frame when used wide open
- Manual focus control via a switch to keep it in manual
- Solid build quality for use in cold and damp night-time conditions
Some specialist astrophotography lenses include features such as built-in lens heater retainers and rear filter support. These help manage condensation during cold night shoots and maintain consistent sharpness as temperatures drop.
Alternatively, lenses for daytime photography can perform extremely well for astrophotography, making them a good option for photographers who want to explore the night sky without investing in specialist optics.
Quick tips for getting sharp astro results
Getting sharp astrophotography results comes down to a few repeatable techniques. Small adjustments to focus, stability and exposure can make a noticeable difference, regardless of the camera or astronomy tools you’re using.
How do you focus accurately at night?
Accurate focus is one of the biggest challenges in astrophotography. Switch to manual focus and use live view to magnify a bright star, planet or distant light until it appears as small and defined as possible. Autofocus systems often struggle in low light, so taking time to fine-tune focus manually is essential for sharp results.
How can you reduce camera shake and vibration?
Stability is critical when shooting long exposures. Use a sturdy tripod or astronomy tripod and avoid touching the camera during exposure. A remote shutter release or built-in timer helps prevent vibration, while mounting binoculars or cameras securely improves sharpness during extended viewing or imaging sessions.
How do you manage exposure and ISO noise in astrophotography?
Long exposures allow more light to reach the sensor, but excessive exposure can lead to star trails. For wide-angle astrophotography, exposure times of around 15 to 30 seconds are a common starting point. Increasing ISO makes stars more visible but can introduce noise, so balance sensitivity with image quality. Image stacking is an effective way to reduce noise and improve detail when processing your final images.
With a bit of planning and experimentation, these techniques help deliver consistently sharper night sky photos and more enjoyable astronomy results.
Do you need a Tripod for astrophotography?
A stable support system is essential in night sky photography and astronomy observation. Whether you’re mounting a camera, a pair of astronomy binoculars, or a telescope, a solid tripod or mount helps eliminate shake and enables longer, sharper exposures under dark skies.
Choosing a tripod for astrophotography
When selecting a tripod for astrophotography, look for models that offer:
- Good weight capacity to support cameras, lenses or trackers
- Adjustable height and secure leg locks for uneven terrain
- Compatibility with ball or 3-way heads for versatile positioning
- Lightweight construction if you plan to hike to dark sky locations
Carbon fibre tripods
Carbon fibre tripods are popular for astronomers and night photographers because they combine strength with portability. They are lighter to carry than aluminium, resist vibration, and remain stable under heavier loads, which are all useful traits when shooting long exposures or using heavier gear.
Recommended tripods and mounts
Benro Slim Carbon Fibre Tripod Kit
A lightweight but strong carbon fibre tripod that provides stable support for cameras, trackers and lightweight mounts. Its balance of rigidity and portability makes it a core choice for many astrophotographers.
Gitzo GK2542-F3W Mountaineer Series 2 4-Section Carbon Tripod Kit
A premium carbon fibre tripod designed for serious field use. It offers excellent vibration resistance and load capacity, making it suitable for heavier equipment or longer exposure work under the night sky.
Sky-Watcher Star Adventurer GTi Mount and Tripod
A combined mount and tripod designed for tracking celestial objects. Its integrated system supports both imaging cameras and small telescopes, bridging the gap between traditional tripods and full equatorial mounts.
Sky-Watcher AZ-GTi Alt-Azimuth Wi-Fi Mount and Tripod
A versatile Wi-Fi controlled mount and tripod combination that allows smoother tracking and positioning. This setup works well for both visual astronomy and astrophotography with cameras or binoculars.
Manfrotto Befree 3Way Live Advanced Aluminium Tripod Kit
A solid aluminium tripod with a 3-way head that allows precise adjustments. While not carbon fibre, it offers reliable stability and is a good choice for photographers who prefer a cost-effective tripod with solid performance.
Vanguard Alta Pro 3VL 303AV 18 Aluminium Tripod with Levelling Base and Video Head
A budget-minded aluminium tripod with a levelling base, useful for achieving level setups on uneven ground. Works well with lighter cameras and trackers used in night sky photography.
Vanguard Alta Pro 3VRL 303AT Aluminium Tripod with Removable Levelling Base
Another value-oriented aluminium tripod, offering flexibility with its removable levelling base. A practical choice for beginners or those seeking stable support without a heavy investment.
Should you get an binocular tripod for astro?
Astronomy binoculars often benefit from being mounted on a tripod, especially at higher magnifications or during longer observation sessions. A tripod helps reduce hand shake and improves comfort for extended viewing of lunar detail, star fields, and brighter deep-sky objects.
To support binoculars on a tripod:
- Use a binocular tripod adapter, which clamps between the binocular hinge and the tripod head (Find the right model from various popular brands in our binocular accessories pages)
- Ensure the tripod head allows smooth tilt and pan adjustments for easy tracking
- Consider a 3-way head for fine control when scanning the sky
A stable astronomy tripod with the right adapter makes viewing more comfortable and significantly sharper.
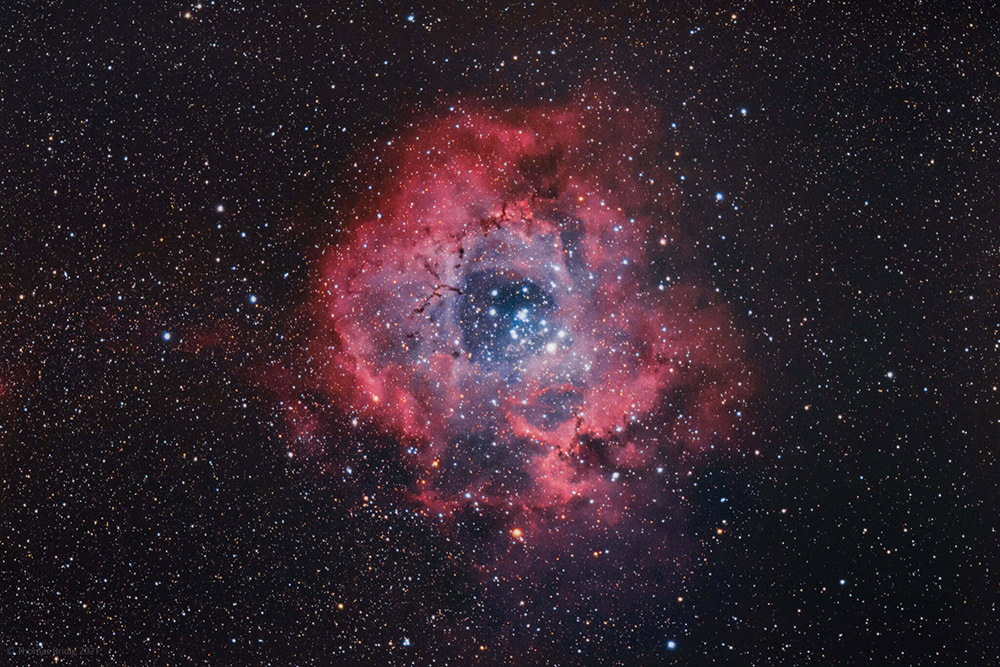
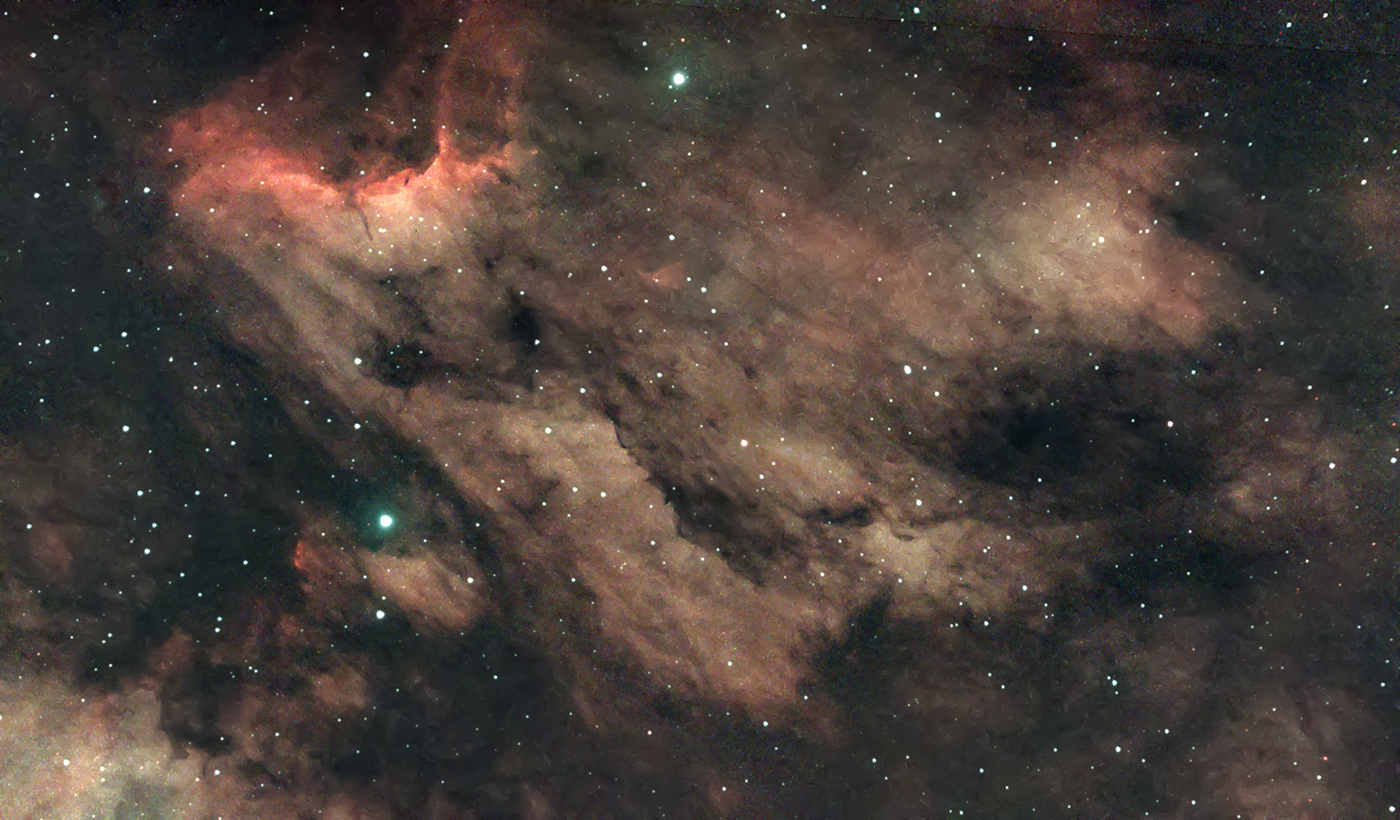
Rosette Nebula ©Tom Bridle
Best Camera bags for night photography
A suitable camera bag can make night photography and astronomy sessions far more comfortable, especially when carrying gear in low light or travelling to darker locations. Unlike daytime shooting, night sessions often involve extra equipment such as tripods, binoculars, power packs and warm clothing, all of which benefit from thoughtful organisation.
When choosing a camera bag for night photography, look for designs that offer easy access to your gear without needing to fully unpack in the dark. Weather resistance is also important, as night shoots often involve dew, damp ground or sudden changes in conditions. Well-padded shoulder straps and back panels help when carrying heavier loads over longer distances, particularly when walking away from urban light pollution.
Internal organisation matters more at night than many photographers expect. Clearly defined compartments make it easier to locate lenses, accessories and batteries by touch alone, while external attachment points are useful for securing tripods or lightweight astronomy gear. A practical camera bag helps keep your focus on the night sky rather than managing equipment in challenging conditions.
Astronomy photography tips and guides
At Park Cameras, we work closely with photographers to share advice and inspiration across all areas of photography, including astronomy.
Park Cameras’ resident astro enthusiast, Johnathan Penberthy, has created month-by-month photography tips to what you can photograph in the UK night sky. Alongside this, we also have a wide range of buying guides to help you plan your shoots and choose the right equipment. These are designed to help you build confidence, understand your equipment, and improve your results when photographing the night sky and other subjects.
Astronomy photography for beginners
Getting started with astrophotography can feel daunting, but learning the basics makes a big difference. Our beginner guide by Andrew Whyte covers camera settings, focusing techniques and essential equipment, helping you prepare for your first night shoots and understand how to approach astronomy photography step by step.
Moon photography
Photographing the Moon is often the first step into astrophotography. It’s a rewarding subject that allows you to practise technique while capturing impressive detail. From photographing supermoons to capturing the lunar eclipse, and Lunar Photography Tips From Jonathan Penberthy, our guides explore how different lunar phases affect your images and how to plan your shots accordingly.
Photographing Jupiter and Saturn
Jupiter and Saturn are among the most recognisable planets in the night sky and can be observed with the naked eye or photographed using binoculars, cameras or telescopes. Our guides explain how to locate them, which astronomy gear works best, and how to improve your results with the right accessories.
With a better understanding of astronomy viewing and photography, you can explore a wide range of astronomy telescopes, binoculars and accessories to suit your interests, whether you’re observing visually or capturing images of celestial objects and events.
Meteor shower photography
Meteor showers offer one of the most exciting opportunities in night sky photography, capturing fast-moving streaks of light against wide star fields. Timing and planning are key, as activity peaks vary throughout the year and often occur during the early hours of the morning. Our meteor shower photography guide explains how to prepare for a shoot, choose suitable camera settings, and improve your chances of capturing meteors during major annual events.
Free software for astronomy photography
Free software can play an important role in astronomy photography, especially for beginners. DeepSkyStacker is widely used to combine multiple images into a single stacked file, helping reduce noise and reveal faint detail in nebulae and star fields. For planning and locating targets, Stellarium provides a free, browser-based star map that shows the night sky in real time, making it easier to identify constellations, planets and deep-sky objects from your location.
The Rule of 500 (quick reference guide)
The Rule of 500 is a simple guide for avoiding star trails when shooting without a tracker. Divide 500 by the focal length of your lens to estimate the longest exposure time in seconds before stars begin to trail, with shorter times needed for crop-sensor cameras. There’s a handy table in the Meteor Shower Photography Tips post mentioned earlier that can help get the right exposure.
Now that you have a better understanding of astro viewing and photography, you can explore our range of astronomy telescopes, binoculars and digital cameras to suit every level of interest. Don’t forget to share your photos with us so we can see what you’ve captured.
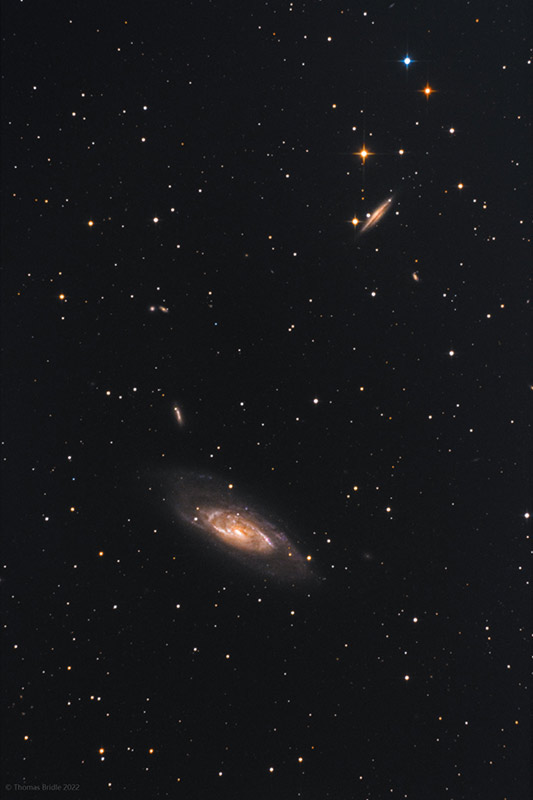
M106 and NGC 4217 Galaxies ©Tom Bridle
Share this post:
By Nick Dautlich on 21/01/2026
Nick Dautlich
Senior Content Writer and Product Reviewer
Nick Dautlich is the Senior Content Writer and Product Reviewer at Park Cameras, with over 15 years of photography experience. A Sony Imaging Professional and expert reviewer, Nick has worked with major brands such as Canon, Sony and Nikon. His work is also featured on Vanguard World UK’s website, Capture Landscapes, and Shutter Evolve. Nick’s photography includes National Trust projects and magazine covers and he is passionate about landscapes and storytelling. Nick also enjoys hiking and teaching his children about nature. Learn more on his profile page.

Trade in your old equipment
Fast and easy trade in service ensures your old gear is collected efficiently and you are paid quickly! It's very simple to trade in your unwanted photography gear. Just head over to our dedicated Sell or Part Exchange page, fill out the details, and we'll get back to you with an offer for your old gear. Take the cash, or put it towards the cost of your new gear. It's up to you! Find out more
sign up to the newsletter
Keep up to date on the latest photography news, events and offers. Sign up now